My new hobby – apart from cooking of course!! Anyone else into crochet??
![]()
My new hobby – apart from cooking of course!! Anyone else into crochet??
![]()
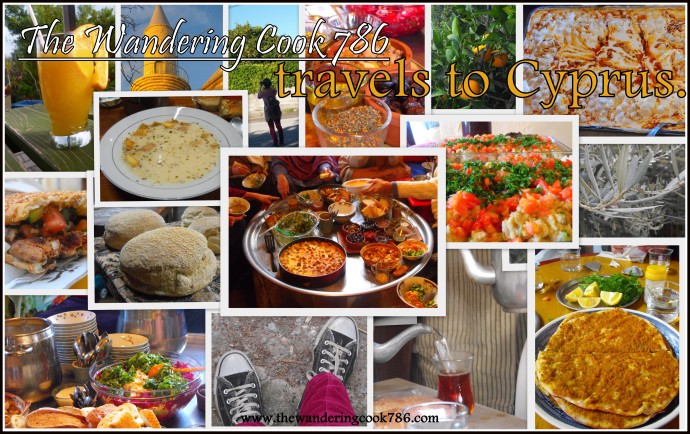
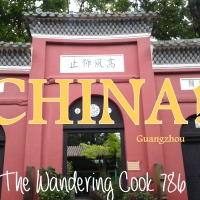
***The Wandering Cook 786 is back from Cyprus!!!!!***
With lots to tell on the food, the country and more food! Next week, I will be blogging a diary on this website from Day 1 – Day 10 of my trip in the sunny island of Cyprus depicting the foods we ate, the places we visited and the blessings I have learnt about food in general ♥ AND then afterwards I will be trying to re-create the foods I had experienced in Cyprus sharing with you the recipes!!!
Lots to come from The Wandering Cook 786xxx
As some of you might know, I’ll be off to Cyprus next week so this week I will be trying my best to uploaded as many recipes including requested ‘Turkish Chickpea Rice’ which hopefully will be up soon also.
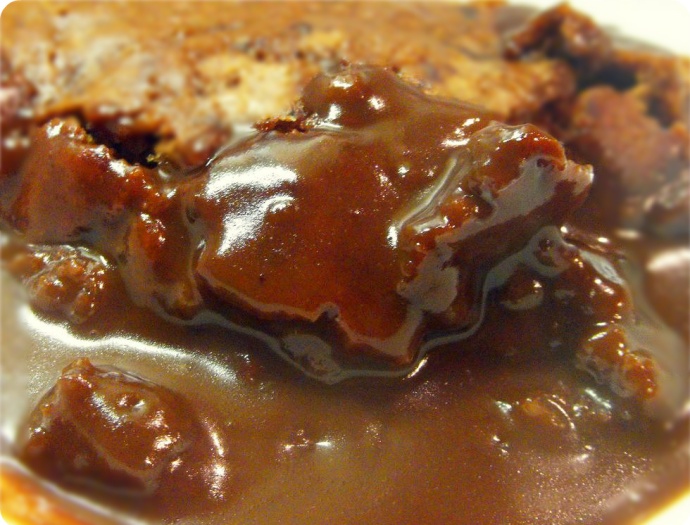
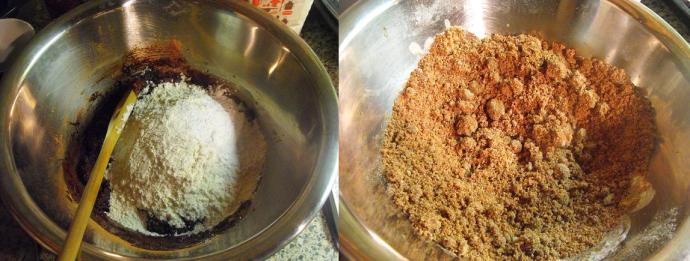
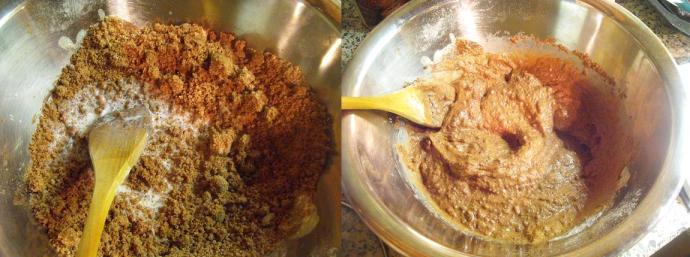
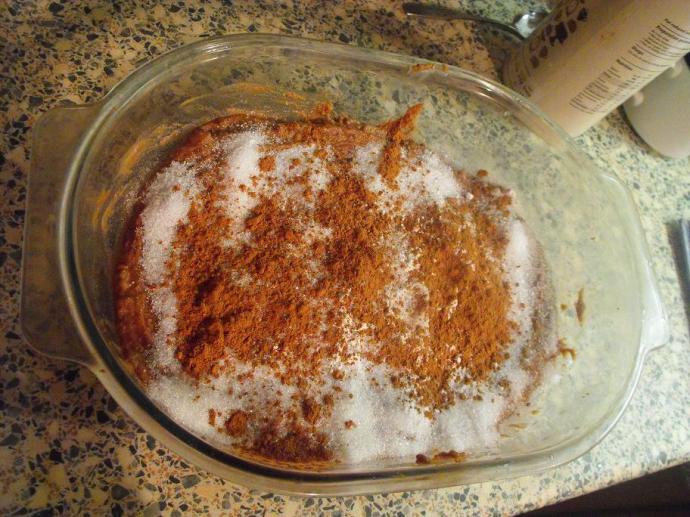
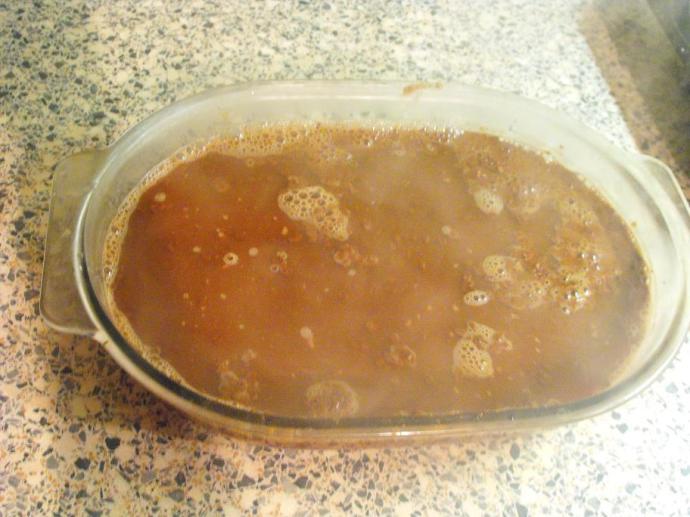
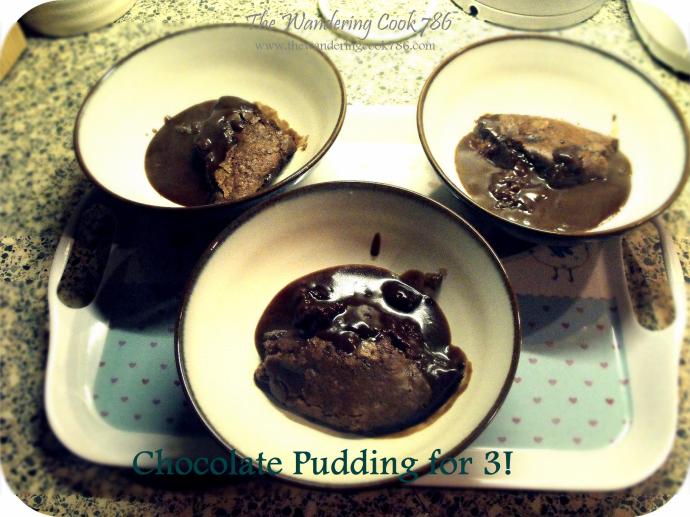
For this post, I wanted to show you all an easy way to make chocolate pudding with simple ingredients from your cupboard and no eggs needed!
I came across this recipe when I had family staying over for the week and we all craved something chocolatey! And since I had no eggs in the fridge and the nearest supermarket is 5miles away from me, I had to research hard on what to make. Till I came across the most yummiest and delicious chocolate dessert that any chocolate-craving fanatic would love and satisfy their craving!
I have made this countless times and easy time it comes out a bit different but still with the same rich taste. I have also tweaked it a bit but you don’t have to be too fussy with the measurements.
Preparation: 10mins
Cooking time: 35mins
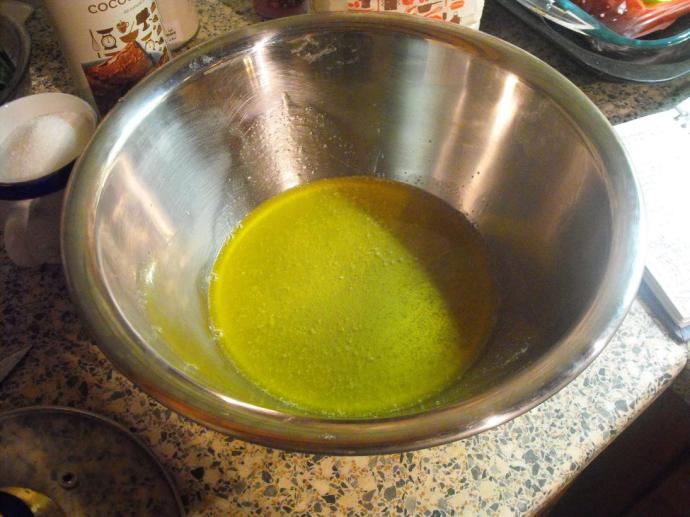
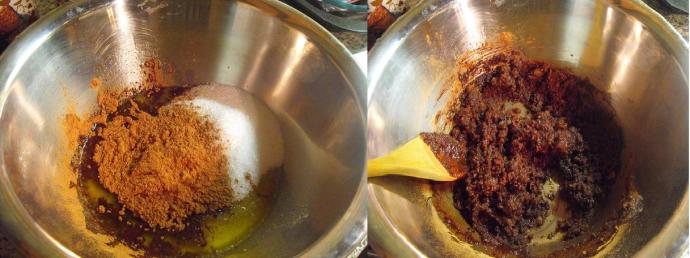
Ingredients:
For the last stage of the method, ingredients needed:
Method:

![]()
Whereas you can find The Wandering Cook786
Facebook, where I always give a sneak peek of whats to come before posting on my blog:
www.facebook.com/thewanderingcook786

YouTube, where you can find video tutorials of my recipes
www.youtube.com/thewanderingcook786
Twitter, where you can tweet me your versions of Chocolate Pudding or any other recipe on here!

xxx Mea xxx
***NEW RECIPES & TRAVELS FOR 2013***
Indonesian Chicken with coconut milk, Turkish rice with noodles, how to prepare Turkish coffee and authentic Turkish tea, Thai chicken curry, a range of Spanish foods, Lush desserts including chocolate gooey pudding and much much more! Including a trip to Cyprus to experience the Mediterranean cuisine, all on The Wandering Cook 786!

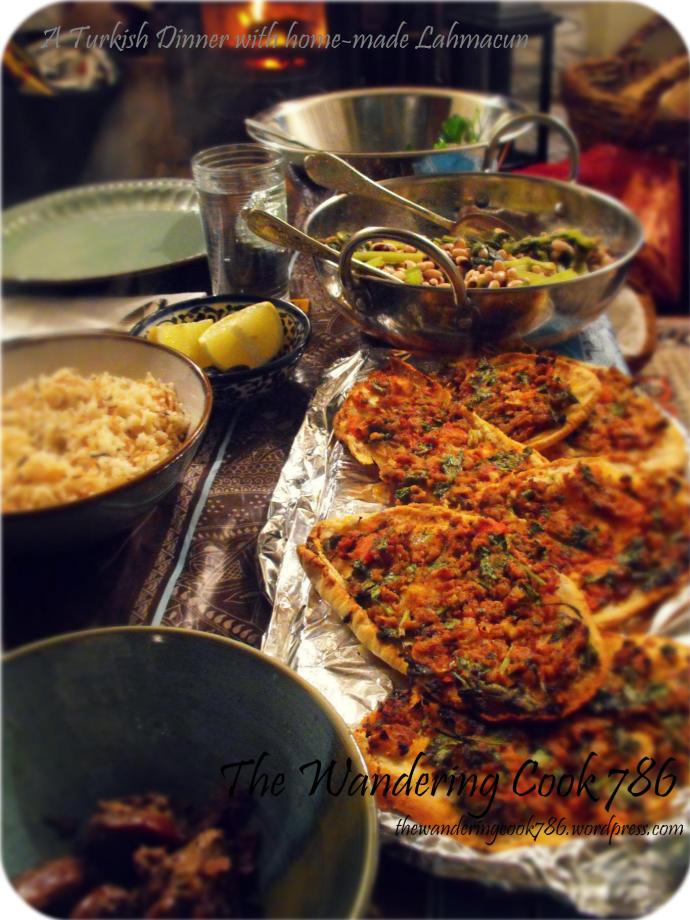
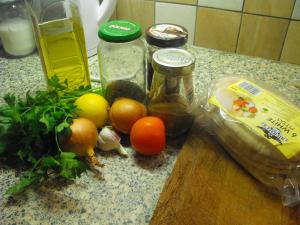
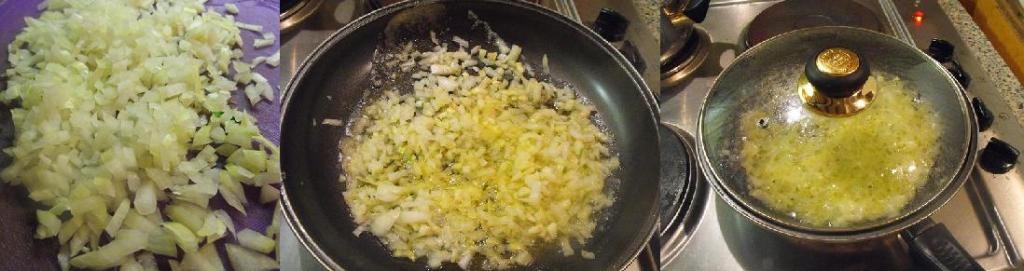
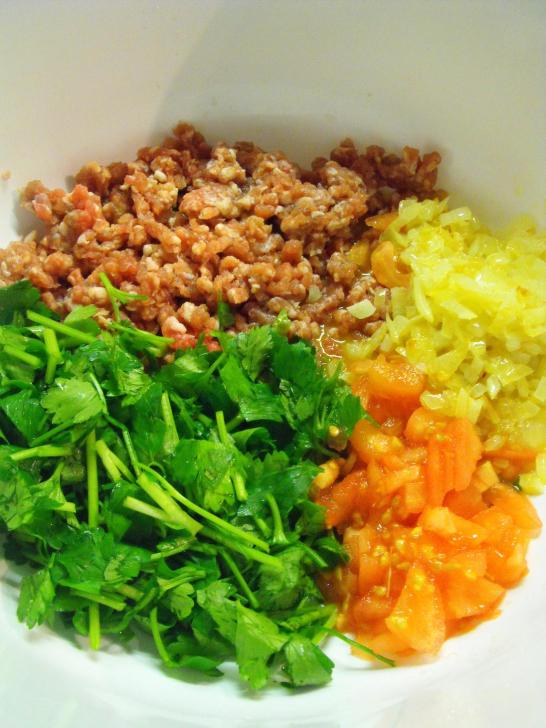
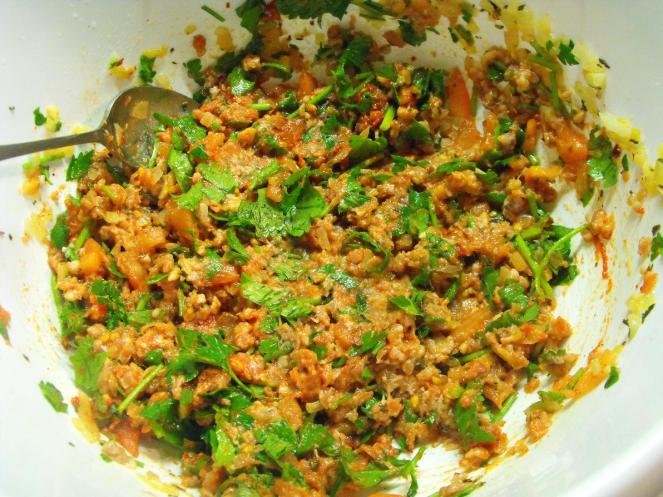
Lahmacun, lahmajun, or lahmejun (Turkish: Lahmacun), (Armenian լահմաջուն lahmaǰun or լահմաջո lahmaǰo), from Arabic: لحم بعجين, lahm bi’ajīn, “meat with dough”, is a round, thin piece of dough topped with minced meat (most commonly beef and lamb) and minced vegetables and herbs including onions, tomatoes and parsley, then baked. Lahmacun is often served sprinkled with lemon juice and wrapped around vegetables, including pickles, tomatoes, peppers, onions, lettuce, and roasted eggplant; a typical variants may be found employing kebab meat or sauces. – Wikipedia.
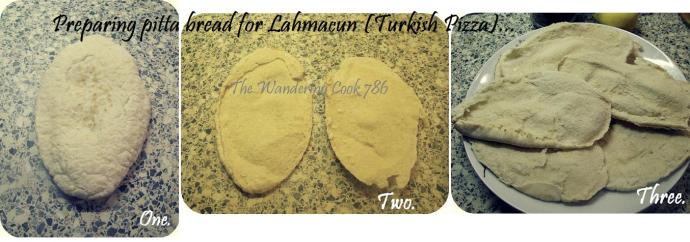
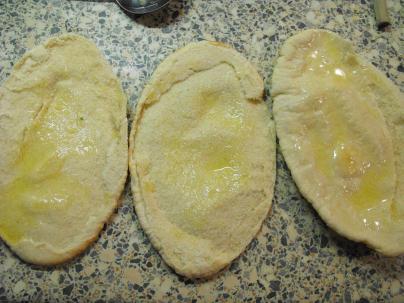
My take on Lahmacun comes from memories of my childhood when my parents, brother and I used to make home-made Lahmacun by using leftover pitta bread. It was a joyous occasion that has always been kept with me as a memory I cherish. My father would be the one preparing the mince meat, my mother the one placing them in the hot oven or under the grill and my brother and I picking our toppings! So as a childhood memory I decided to make Lahmacun using pitta bread again but my own take incorporating different spices and herbs to enhance the flavor. I definitely recommend making this with your children! And as you wont be making your own dough, it also saves time and creates more time to have some fun while cooking!
Ingredients:
Method:

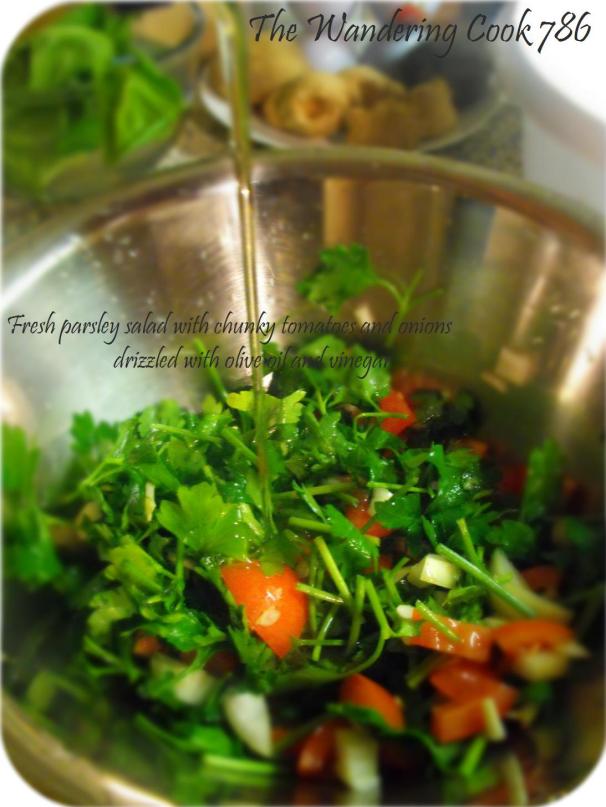
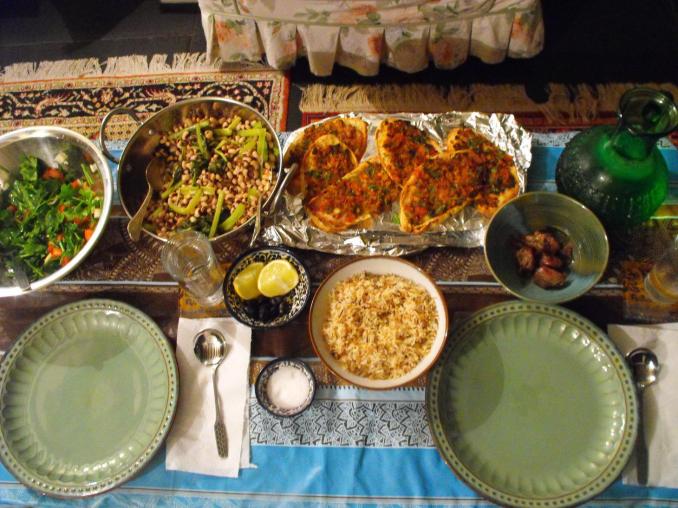
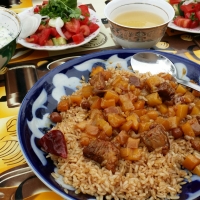
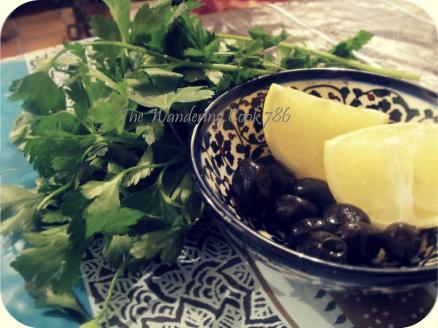
I served my Lahmacun with boiled black-eyed beans with Swiss chard drenched in olive oil and vinegar, fresh parsley salad (featured in above picture), Turkish noodle rice, fresh lemon, olive and for the daring, cooking kidneys.
![]()
Whereas you can find The Wandering Cook786
Facebook, where I always give a sneak peek of whats to come before posting on my blog:
www.facebook.com/thewanderingcook786
YouTube, where you can find video tutorials of my recipes
www.youtube.com/thewanderingcook786
Twitter, where you can tweet me your versions of Lahmacun or any other recipe on here!
xxxxxxx The Wandering Cook 786 xxxx

Hey guys, after making a yummy roast chicken dinner for family last weekend. I had leftover chicken, so decided to try a go at making Pithivier (French dish using puff pastry). Usually Pithivier is a sweet ‘pie’ but you can also make savory versions, so I made myself chicken and mushroom pithivier with some courgettes I had also leftover in the fridge.
To go straight to the video, scroll to the bottom.
To my surprise, this dish is now my top 5 favorite meals!!

Prep time: 35-40mins
Cooking time: 35mins
Ingredients:

Method:


Served great with potatoes!
For the VIDEO Tutorial which I also made for this recipe accompanied by lovely french instrumental music, visit:
http://www.youtube.com/watch?v=1PAT5hk12Hw&feature=plcp
(link will open in new window)
You can also click on the picture below…

Let me know how you get on and even tweet me your pictures! @ thewanderincook
Don’t forget we’re also on Facebook, Like to get updates on the latest recipes coming up on my blog!
http://www.facebook.com/thewanderingcook786
Happy cooking!
xxx The Wandering Cook 786 xxx

Now I for one do not like wasting food! If there’s a little bit of green mold on piece of bread, just take that bit off and continue eating. Or even just break the bread into pieces and toast them under the grill and use them in soup.
If milk is just beginning to go off, turn it into cheese by boiling it with some lemon juice!
So for this recipe, I had some pitta breads that were beginning to get moldy I decided to make home made garlic bread out of them from a recipe inspired by the free food magazine in my local Co-operative supermarket. And the results were delicious! A great side to any dish.

Ingredients:
Method:


Enjoy!
Don’t forget I’m also on Facebook! >>> http://www.facebook.com/thewanderingcok786
Twitter>>> #thewanderincook
Any questions feel free to comment below and I’ll do my best to answer as soon as poss.
Let me know how you get on with making these and the best thing is, on the frying stage you can add other things aswell as dried basil, such as mixed herbs, coriander powder, dried mint, olive oil..etc.
xxx
My recent dinner party with guests got served this delicious main course…

Yummy Chicken curry, inspired from my Pakistani motherinlaw ❤
This light and flavorsome meal is a delightful surprise with such yummy taste, containing fenugreek leaves (methi), green peppers and potatoes. I whipped this meal up when I had guests by making it the night before and serving the next day, which also increased the intensity of the flavors by letting it sit in it’s spices overnight. This is also not a recipe that contains a millions-and-one ingredients, the majority of the ingredients can be purchased from your local supermarket.

Prep time: 25minutes
Cooking time:25mins (+45minutes simmer time)
Ingredients:

Utensils needed:
Method:


For the video tutorial that I made for this recipe so you can cook along, click this link >>VIDEO TUTORIAL CHICKEN CURRY
I made this main course, after my starters of Turkish Lentil Soup which can also be found on this blog or also my YouTube page: http://www.youtube.com/thewanderingcook786 don’t forget to Subscribe for updates!
Enjoy!
Any questions feel free to comment below.
The Wandering Cook 786 xxxxxx
 Hey all,
As you might of noticed in my previous post about my scrummy Eid Boxes, they contained home made carrot cake (which there is a video tutorial available here – http://www.youtube.com/watch?v=iemiz48dkAw&feature=BFa&list=ULT5Grddo3mzA
But also had home-made chocolate chip cookies, they were my first time making them so that’s why I didn’t do a video tutorial as yet just in case they didn’t come out nice!
To my surprise, they were delicious and were praised immensely by family and neighbors.
So for that reason here is the recipe and a video tutorial will be in the making!
Prep: 20mins
Cooking: 10-15mins
Ingredients:
Method:
Enjoy!
xxx
After the festive time of Eid, thinking it’s all over until next year. More family members ended up visiting us here in the countryside where it made Eid – part 2. So on with the major cooking!

For that reason, I took the opportunity to do some more Video Tutorials, this time, Turkish Lentil Soup – Mercimek Corbasi. Recipe inspired from my mother.
My own Video Tutorial – Link
Ingredients:
Cooking time: 20-30mins Great for when you have guests!
Method:
Enjoy!
Lovely for a winter’s evening

This WordPress.com site is the cat’s pajamas
Digging into memory
by Mike Dash
A great WordPress.com site
A foodie with a passion to travel
a blog about my food related experiences
statecraft, strategy, society, and Σοφíα
Culinary Walks in the WORLD
Because food can change the world
Food porn for the masses
Indulge- Travel, Adventure, & New Experiences
Creating fast and nutritious lunches 1 bento box at a time…..
My life from the heart of Berlin!
mediterranean cuisine and ports beyond